Are you tired of rummaging through your closet, only to find clothes that don’t quite fit the way you want them to? Fret not, fashion enthusiast, because we’re about to embark on a thrilling journey into the world of DIY fashion clothing tips, specifically tailored (pun intended) for achieving that perfect fit! Whether you’re a seasoned sewing maestro or a complete novice, these tips will empower you to transform your wardrobe and create clothing that flatters your unique body shape and style. Get ready to embrace your inner fashion designer and make your garments truly your own!
Measure Twice, Cut Once: The Foundation of Tailoring
Before diving into the wonderful world of tailoring, it’s essential to start with the basics – accurate measurements. This is your DIY fashion clothing tip numero uno!
How to Get the Perfect Measurements
- Invest in a flexible measuring tape. It’s your new best friend!
- Wear form-fitting clothing to get the most precise measurements.
- Measure your bust, waist, hips, inseam, and any other areas relevant to your garment.
- Don’t forget to measure your arms for sleeves, or you might end up with a ‘limb-lengthening’ surprise!
- Keep a record of your measurements; it will save you time in the long run.
Selection Matters: Choosing the Right Fabric
Now that you’ve got your measurements down to a T, let’s talk fabrics. Your choice of fabric can make or break your DIY fashion project, so pay attention!
Fabric Selection Tips
- Think about the garment’s purpose. Is it for everyday wear, a special occasion, or lounging at home?
- Consider your comfort level with different fabrics. Some people love the feel of silk, while others prefer the coziness of cotton.
- Keep in mind the season. Lightweight fabrics like linen are perfect for summer, while wool is ideal for colder months.
- Be aware of the fabric’s stretch and drape. A fabric with a bit of stretch can be forgiving when tailoring for a snug fit.
Sew It Up: Mastering Basic Stitching Techniques
Now, let’s get down to the nitty-gritty – sewing! Don’t worry if you’re not a seasoned seamstress; we’ll walk you through some essential DIY fashion clothing tips for stitching like a pro.
Must-Know Stitching Techniques
- Straight Stitch: Your bread and butter stitch for seams and hems. It’s as simple as it sounds – a straight line!
- Zigzag Stitch: Ideal for preventing fraying in fabrics and creating stretchy seams. Zigzag, zigzag, and you’re good to go!
- Backstitch: This reinforces the beginning and end of your seams, ensuring they don’t unravel.
- French Seam: For a polished look, encase your raw edges in a neat seam. It’s perfect for lightweight fabrics.
- Blind Hem Stitch: Create virtually invisible hems for a sleek finish.
- Basting Stitch: Temporary stitches for fitting adjustments – your ‘trial run’ stitch, if you will.
Tailoring Techniques: Nipping and Tucking
Now that you’re armed with the knowledge of basic stitching techniques, it’s time to put them into action and tailor your garments for a flawless fit!
DIY Tailoring Tips
- Taking In: To make a garment smaller, pin along the sides and sew a new seam line.
- Letting Out: If your clothes are too tight, locate the seam allowance, unpick it, and sew a new seam further out.
- Shortening or Lengthening: Adjust the length of pants, skirts, or sleeves to suit your style.
- Darts: For a more fitted look, consider adding darts to the bust or waist.
- Tapering: To create a tapered effect, gradually narrow the width from a wide area down to a smaller one.
- Adding Elastic: Introduce elastic to cinch in waistbands or create ruching for a trendy touch.
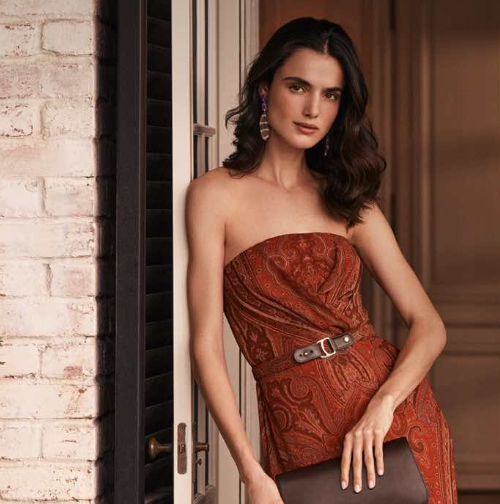
Accessorize to Maximize: Belts, Buttons, and Beyond
Your DIY fashion clothing tips journey doesn’t end with sewing alone. Accessories can be your secret weapons for achieving a perfect fit and adding a touch of personal flair!
Accessorizing Hacks
- Belts: Cinch a loose dress or blouse at the waist with a stylish belt.
- Buttons and Snaps: Move buttons and snaps to adjust the fit of shirts or jackets.
- Drawstrings: Insert drawstrings into hems or waistbands for adjustable gathering.
- Safety Pins: In a pinch, use safety pins to temporarily adjust a loose garment.
- Fashion Tape: Keep your plunging neckline in place with double-sided fashion tape.
- Shoe Lifts: Elevate your stature (literally) with shoe lifts for that perfect trouser length.
DIY Fashion Clothing Tips for Common Fit Issues
Have you ever faced a fashion conundrum that left you scratching your head? Fear not, for we’ve compiled a list of common fit issues and DIY solutions that’ll have you saying, “That was easy!”
Fixing Common Fit Problems
- Gaping Neckline: Sew small darts along the shoulder seam to eliminate excess fabric.
- Baggy Waist: Add darts or take in the sides to define your waistline.
- Saggy Pants: Insert elastic into the waistband for an adjustable snug fit.
- Too-Long Sleeves: Hem them or cuff them up for a trendy look.
- Bulging Buttons: Replace buttons with a larger size or sew them closer together.
- Tight Collar: Carefully cut the neckline to create a scoop or V-neck.
Your Burning Questions Answered!
Can I tailor my clothes even if I have no sewing experience?
Absolutely! Start with simple projects like hemming pants or sewing on buttons. As you gain confidence, you can tackle more complex tailoring tasks.
How do I avoid making irreversible mistakes while tailoring?
Use basting stitches or pins for temporary adjustments before committing to permanent changes. This way, you can fine-tune the fit without the fear of ruining your garment.
What equipment do I need for DIY tailoring?
You’ll need a sewing machine (or a needle and thread if you’re sewing by hand), scissors, pins, a measuring tape, and fabric chalk for marking.
Are there any garments I should avoid tailoring as a beginner?
Steer clear of leather, fur, and delicate fabrics like silk until you’ve honed your skills. These materials can be trickier to work with.
Can I tailor clothes that aren’t my size at all?
While it’s possible to make minor adjustments, it’s challenging to tailor clothes that are significantly too big or too small. Starting with items close to your size is ideal.
Conclusion: Tailor-Made Confidence!
Congratulations, DIY fashionista, you’ve unlocked the secrets to tailoring your clothing for a perfect fit! Armed with the knowledge of accurate measurements, fabric selection, essential stitching techniques, and clever tailoring hacks, you can